Tuesday 3 October 2017

Tstv CEO Bright Echefu - 7 Things You Do not Know About Him


Tstv CEO Bright Echefu - 7 Things You Do not Know About Him


1. Dr. Bright Echefu was at the Medical college of university of Nigeria Nsukka from where he left to pursue further studies abroad.

2. He hails from Obowo in IMO state

3. He is the MD/CEO of Bricke and Athens limited owners of AHTV-Heath Television.

4. He is the chairman of Bright FM.

5. He is also on the board of Bright joy multiveventurs limited.

6. Dr. Echefu is MD/CEO of TSTV

7. He is newly married.

Monday 2 October 2017

Tstv Channels List

Here’s the list of channels TStv Africa offers.

Tstv Free Channels

Dish TV-100

Tstv Channels Language/Culture/Pan Africa

M Africa Movies-125
M Africa Yoruba-126
M Africa Hausa-127
RiwenduTV-128
NollywoodTV-130

Tstv Channels General Entertainment

Grande Comedy-150
Nigeria Central Television-151
Fox Entertainment Group-152
BEN-155
Ait-156
NTAi-257


Tstv Channels Movie

Grande Movies-175
Movie Box-176
MBC 2-177
MBC Action-178
MBC Max-179
TeleNovela Channel-181
Nina TV-182
Televista-183
Btv-184


Tstv Channels Kids

A1 Kids TV-200
Panda Biggs-201
Nickelodeon-202
JimJam-203

Tstv Channels Health and Lifestyle

AHTV-215
Fine Living-216
Fashion One-217

Tstv Channels Documentary

National Geographic-222
Nat Geo Wild-223
Discovery Science-225
IDX-226


Tstv Channels Music

Hits tv-240
Trace Africa-241
Mtv Base-242

Tstv Channels News

CNN-250
Aljazeera-251
BBC News-252
Channels-253
TVC News-254
Bloomberg-255
CGTN-256

Tstv Channels Sports

BeIN Sports 1-276
BeIN Sports 2-277
BeIN Sports 3-278
BeIN Sports 4-279
BeIN Sports 5-280
BeIN Sports 6-281
BeIN Sports 7-282
BeIN Sports 8-283
BeIN Sports 9-284
BeIN Sports 10-285
Euro Sport-286
Fox Sports 1-287
Fox Sports 2-288
Kombat Sport-289


Tstv Channels Religious

Grande Gospel-300
Emmanuel tv-301
TBN Networks-302
Qraa-303
Sunna TV-304
EWTN-305

Sunday 9 October 2016

How to Alter The Date of a Post In Blogger After Publishing

Reason why you need to the change the date you posted a topic on blogger
1. To show to your viewer that new information has be added to the post
2. To tell Google search engine that you have added more details
3. You can as well use this option to back date a post.

Let Begin.
1. Log into your blogger account.
2. Click on posts, and look for the post you want to update it information or change the date.
3. Click on the post [edit link] --->>> the post will open for editing)


4. click on Published on (found at the right hand side), check on set date and time, set the new date you intend to use and click on done to save it

5. Click on update to make final save


6. click on posts to see the new date and position assign to it


From our example you can see that the date of the post has change from 18/09/2016 to 20/09/2016 and position from 3rd to 2nd.

How I Was Able To Detect And Fix Google Major Spam Problem On My Website

Step on How to Fix the Google Major Spam Problem Manual Action Applied to Website


If you receive a message in your email or on your google webmaster console from Google Search Console Team stating the following'

Major spam problems on http://www.yourwebsitname.com/
To: Webmaster of http://www.yourwebsitname.com/,
Google has detected that your site violates our Webmaster Guidelines. Because this critical issue lowers the quality of search results for users, Google has prevented the offending pages from showing in Google Search results. This manual spam action has been applied to www.yourwebsitname.com /. To reinstate your site, you must significantly change the content to conform to our guidelines. Only after making those changes should you submit a reconsideration request in order to have your content included in Google Search results.


Here are the steps i followed to be able to detect and fix it

Step 1.
Sign into your Google webmaster console [direct link here >> https://www.google.com/webmasters]

Steps 2.
Click on the website name, that the manual spam action was applied to
Manual Sparm


Steps 3.
From your Dashboard > Craw > Crawl Errors
Look out for links that is taking googlebot to non existing page, whenever it craw your website.
Note:
Take note of the date Google Search Console Team applied manual spam action to your website, as this will give us some clue to what specific date to look out for link that is broken in the webmaster console
Manual-Action-Crawl-Error

You can also use this website http://www.siteliner.com/ to detect broken link in a website
The free version only allows you to use it once in 30 days.
What that means is that, if you have detected a broken link and you fixed it, once you re-visit the website within that 30days, it will still be showing you the old result, until you wait after 30 days. to see the new result.


Fixing of the link show error whenever googlebot crawl your website.

Steps 4.
After you have detected the link giving out error
Log into you blogger home page (direct link https://www.blogger.com/home)
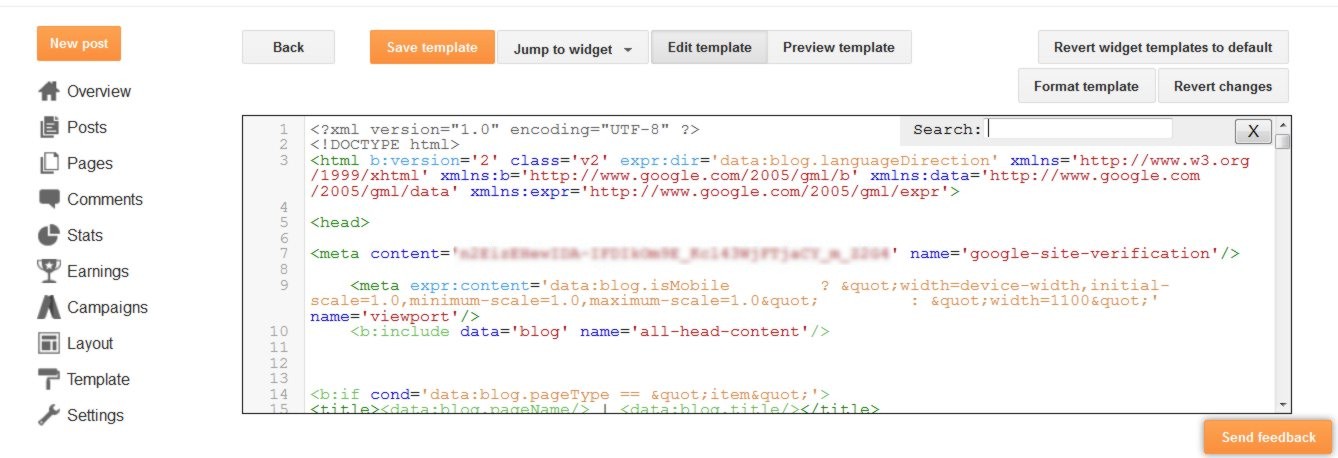
Dashboard > Template> Edit HTML

Search for the broken url and replace it with the correct one
Here the broken link is found in the website template


If the broken link is found on a post page. Open the post page and make correction to the link


Enabling of Custom Page Not Found and Customs Redirects
From your blogger Dashboard > Settings> Search preferences

On the custom page not found enter the following script
<h1>Oops 404!</h1>
<br><b>The page your are looking for may have been renamed, moved or is no longer available.</b>
<br><br><b>You will be redirected to homepage shortly.</b>
<script>
blogger_redirect = setTimeout(function() { location.pathname= "/" }, 7000);
</script>

Major-Spam-Custom-Page-Not-Found


Enabling of Custom Redirects.
Custom redirect is used to redirect a link that is wrongly enter/type in the address bar to the correct.
From your Google webmaster console, if crawl error show you a link that is wrongly spelt by user visiting your website, with the help of custom redirect you can manually point such link typed incorrect to the supposed real link they intend visiting.

From your blogger Dashboard > Settings> Search preferences
To set it click on Edit > New redirect
In the field from > type in the incorrect url that is showing error
In the field to > type in the suppose correct url that the user intend to visit
Check on permanent
Click on save, finally click on save changes


Major-Spam-Custom-Redirects


How To Submit A Reconsideration Request?
After you are through, is now for you to apply for reconsideration

In your Google webmaster tools, click on Search Traffic > Manual Actions> click on Requite a review
Major-Spam-Reconsideration-request


Type in your message stating how you were able to resolve it.
Check on I acknowledge that my site does not violate google's webmaster guidelines.
Click on request a review.
A copy of the message will be sent to your email after submission


If done correctly after a week, you will get a message from Google Search Console Team stating the following

To: Webmaster of http:// www.yourwebsitname.com /,
Good news! Your reconsideration request has been approved and Google has removed any manual action on your site. Bear in mind that removal of a manual action doesn’t guarantee that your site’s ranking will increase.

Check the Manual Action Viewer
It can take some time before the status of your site is updated in the Manual Actions Viewer and our crawling and indexing systems. You can confirm that your site does not have any manual actions by looking in the Manual Action Viewer.

Check Security Issues
If your site was hacked, other vulnerabilities not mentioned in the Manual Actions Viewer could be affecting your site. Check the Security Issues section of Search Console for any issues that need to be fixed

Image 7.


Wait for 48 hours after receiving the message from Google Search Console Team for your website to start showing up on Google search result.


Copy of the message I sent as reconsideration request to google when sparm action was applied to my blog

Message start here>>>>>>
Dear Google Webspam team member,

Thank you for taking the time to read our request. After receiving message from Google, dated August 8, 2016, Subject Title: Major Spam problem I made some research online on why a manual spam action has been applied to my blogger blog; I found out that one of the major reasons is as a result of broken link, which is not good for search engine and for human as well, and also I found out that, i have not set or activated custom page redirect to redirect non existence page to the home page

Below are the procedures I follow to resolve broken link and to activate custom page redirect to show (error 404)

Detecting of broken link through Google webmaster console.
I log into my Google webmaster account
I click on craw, then craw errors
From there I saw the link that is broken and leading to non-existing page, whenever googlebot craw.
The broken link is found in the header of all my page, there by leading google bot to non existence url any time it craw pages of my blog.

Here is the broken link found in the header section of my blogger blog
2013/11/national-open-university-noun-post-graduate-application-programme-form-for-admission-and-list-of-courses-fees.html

Fixing of the link showing errors in webmaster console
I log into my blogger account,
Click on template,
Click on edit HTML
I Search for the below broken url, that was generating error whenever google bot craws any of my page.
2013/11/national-open-university-noun-post-graduate-application-programme-form-for-admission-and-list-of-courses-fees.html

I then replace it with the correct url
http://www.youwebsitename.com/2013/11/national-open-university-noun-post-graduate-application-programme-form-for-admission-and-list-of-courses-fees.html


Enabling of Custom Page Not Found
For the custom page not found, after logging into my blogger account,
I click on setting,
i click on custom page not found, i then copy and past the below code into the field box, then i click on saves

<h1>Oops 404!</h1>
<br><b>The page your are looking for may have been renamed, moved or is no longer available.</b>
<br><br><b>You will be redirected to homepage shortly.</b>
<script>
blogger_redirect = setTimeout(function() { location.pathname= "/" }, 7000);
</script>


I have learnt my lesson, from now on; I will be checking my Google webmaster console tools for possible error coming from my blog.

Thank you again for reading this request.

Sincerely
Message end here>>>>>>

Wednesday 21 September 2016

How to verify your domain ownership to make it more resilient with more than one method


Message from Google
You are already a verified owner of [this domain]. Verifying with more than one method will make your ownership more resilient.

If you bought  a custom domain name and you are be asked by Google to verify it to make it more resilient, what they are asking you to do is to make use of more than one verification method to verify you custom domain name to make it more healthy/strong

If you have been verify through DNS CNAME record, you can add more to it. Follow these steps below on how to use the html tag method to verify the ownership of your website.


Sign into your Google Webmaster Account, click here to do so

After signing in, click on the link below

Click on add a property
Enter the URL of the property that you'd like to verify.
Click on continue to proceed

website-verification-add-a-property

Click on the link verify using a different method.

website-verification-add-a-property


Select the tab verification methods
Check on HTML tag
Copy the Google site verification meta tag code, to be pasted in the head section of the html template

google-html-tag-website-verification

Next sign into your blogger account, > template >edit html
Search for the tag <head>
Paste the code copied, just below the head section
Click on save template.

html tag site verification method

Go back to the webmaster verification page and click on verify

You will receive a message state below
Great job, http://www.yourwebsitename.com/ is now verified! You can now use Google services for your property such as Search Console.

Add additional owners to http://www.stcharlesedu.com
Verify another property.
View your list of verified properties
[Image - list-of-google-verify-property]


list-of-google-verify-property

Tuesday 20 September 2016

How to use Microsoft Window Paint to Scan and Resize Passport Photograph


Microsoft Paint
If you have no other graphic application installed in your pc, you can make use of this operating system application to edit your scan document, though it has limited feature, it can be used to resize an image to any dimension.


Application Launching
Launch the application programme, from the start icon select all programs >Accessories> and click on Paint or from the search programme and files field type mspaint and click on the search button or press the enter key


To Retrieving Scan Passport Photograph
From Storage Media
Click on the file menu > open > locate where the scan passport photograph was save.
click on it and finally click on open

or

From Scanner or Digital Camera
Click on the file menu > click on from scanner or camera


Cropping
We have to crop the scan passport photograph to remove excess background.
Select the rectangular selection


Drag it across the scan passport photograph


 Click on the crop button


Resizing Scan Passport Photograph in Paint
To resize the scan passport photograph to a specific width and height for example 275 x 314 pixel
Do the following:
Click on resize (A dialog box will appear, enter the following sitting)
Click on the pixels button
Uncheck maintain aspect ratio
For width, enter horizontal value as 275
For height enter vertical value as 314
Click on ok.


Saving in Paint
Paint offers the option to save image in four formats.

PNG picture
This option save a photo or drawing with high quality and use it on your computer or on the web.

JPEG picture
This option save a photo with good quality and use it in your computer, in e-mail, or on the web.

BMP picture
This option save any kind of picture with high quality and use it on your computer.

GIF picture
This option save a simple drawing with lower quality and use it in e-mail or on the web.

To save in jpeg file format
Go to the file menu, select save as > click on jpeg picture
 

Type in your file name and click on save


To check or confirm if the scan passport photograph save to the specific width and height you assign to it and also to know the file size of the passport do the following.

Locate where the scan passport was saved, right click on it and select properties, click on the details tab. scroll down to see the detail of the file size, dpi resolution and dimension.


Monday 19 September 2016

3 Best Way On How To Reduce Scan Document Image File Size And Still Retain it Quality

They are so many ways to achieve it, but on this post, I will be teaching on how to do it using Corel Photopaint.

For better understanding of this tutorial, we shall be making use a jpg file, click here to download. It file size is 1.3mb

To confirm the jpg file size do the following:
Locate where the scan document is stored on your pc device
Right click on it, select properties, select the details tab, scroll down to see the image dimension, resolution and file size.

Launch Core PHOTO-PAINT
Start Icon > All Program> CorelDraw Graphic Suite X3> and click on Core PHOTO-PAINT


Open the saved scan document
1. Go to file menu > Open > locate where the scan document is store, click on the document and click on open.

PROCEDURE 1 - Resample Method
1. Go to the Image menu > Resample > and set the following value
a. uncheck Maintain aspect ratio
b. Percentage width: 50
c. Percentage height: 50
d. Resolution: leave this option the way you meet it.

Note. While sitting the percentage width and height, the measurement value for the width and height will be changing, do not bother about it.
d. click on ok, when done


2. Go to the file menu, select save as, > type in your file name, > select save as type as JPG-JPEB Bitmaps, > click on save
A JPEG Export dialog box appear
do the following setting
a. check Progressive
b. sub format: Standard (4.2.2)
c. Compression and Smoothing 0, 0 respectively
d. Preview and click on ok


PROCEDURE 2 - Compression and Smoothing Method
Open the scan document you downloaded
1. Go to file menu > Open > locate where the scan document is saved, click on the document and click on open.

2. Go to the file menu, select save as, > type in your file name, > select save as type as JPG-JPEB Bitmaps, > click on save
A JPEG Export dialog box appear
Do the following setting:
a. check Progressive
b. sub format: Standard (4.2.2)
c. Compression and Smoothing 30, 30 respectively
d. Preview and click on ok


PROCEDURE 3 - Combining both method (resample and compression/smoothing)
If you want to decrease the file size further, combine procedure one and two

Open the scan document you downloaded
1. Go to file menu > Open > locate where the scan document is saved, click on the document and click on open.

2. Go to the Image menu > Resample > and set the following value
a. uncheck Maintain aspect ratio
b. Percentage width: 50
c. Percentage height: 50
d. Resolution: leave this option the way you meet it.

3. Go to the file menu, select save as, > type in your file name, > select save as type as JPG-JPEB Bitmaps, > click on save
A JPEG Export dialog box appear
Do the following setting:
a. check Progressive
b. sub format: Standard (4.2.2)
c. Compression and Smoothing 30,30 respectively
d. Preview and click on ok
 

Conclusion
In the first procedure after saving, the file size and its dimension change.
In the second procedure, only the file size change, the dimension remains intact.
Lastly, in the third procedure the dimension changes and there was a sharp decrease of the file size.

was a sharp decrease of the file size and it dimension change as well.